Blog
When was the last time you looked up at your ceiling fans? If it's been a while, you might be surprised at the amount of dust that has accumulated on the fan blade! Dusting the ceiling fan likely isn't part of your regular house cleaning, and it's tricky to do without making a mess of the dust. Here's a simple, effective way to clean the dust off a ceiling fan: Find a standard-sized pillow case. For an extra smart step in reducing your workload, clean the ceiling fans on the same day you wash linens, and just use a pillow case you're about to wash anyway. Slip the pillow case over the fan blade. Take care to do this kind of slowly as not to knock all of the dust off before the pillow case is in place. Wrap your hands around the open edge of the pillow case and wipe the fan blade as you pull it off. This traps the dust in the case and keeps it from getting everywhere. Repeat for every fan blade, but be careful not to knock the dust out as you go! Why this works Not only does the pillow case trap the dust, but the thin material is easily charged with static electricity; when you wipe the fan blade, it attracts the dust to the pillow case. Though many people probably aren't going to be looking up to appreciate your handywork, a dust-free ceiling fan keeps your air cleaner. You will also be able to amaze your friends with your clever cleaning trick! Remember, too, that if keeping your house clean is a strain on your time, work, or family, cleaning services might help you stay on top of things.
Cleaning windows can be done in two ways. Either you buy the expensive, branded, attractive window cleaners available in stores or make your own homemade easy green glass cleaner recipes from simple ingredients that you already have in your house. Homemade cleaners not only protect the environment but also are not toxic. The only thing they lack is the bright sparkling color and fancy packing. But they turn out to be very cheap and work out well and sometimes even better than the branded window cleaners.

Before You Begin
Avoid Using Harsh Detergents:

Electric dryers:
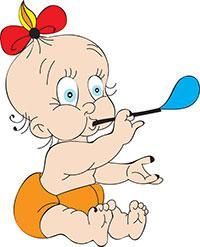
Babies are highly susceptible to illness and infection, mainly because their immune systems are not yet fully developed. Therefore, it is vital to protect your baby from health hazards through measures such as proper cleaning of the baby bottle. Gather the Basic Cleaning Supplies Prepare basics such as hot water, a good brush for the bottles and nipples and dish washing liquid. A good bottle brush helps you to clean the sides and bottom of the bottle. You can also use a gentle nipple brush to clean the rubber nipple which can easily accumulate bacteria. The dish washing liquid should be a non toxic and gentle liquid that is specifically designed for baby bottles and does not leave any residue. Wash the Baby Bottle Right After Use Water, sugar and warmth provide the ideal conditions for germs to thrive. Therefore, it is advisable to wash the baby bottle right after use in order to prevent caking of the milk and the creation of a foul odor which is very difficult to get rid of, especially if you are using plastic bottles. Start off by pouring the leftover milk and rinse the bottles with hot water. Brush the baby bottle in and out using a gentle baby brush in order to avoid scraping off the plastic. Move the baby bottle brush along the edges in order to remove the filmy milk residue. Allow the Baby Bottles to Dry Thoroughly Rinse all the bottle parts in hot running water to remove the soapy residue and bubbles. Place all the parts on a drying rack and make sure they are left to drain and dry thoroughly in a well ventilated location. Bottles can grow fungus and mold if they remain damp for too long. Proper sanitation of baby feeding accessories is the best way to ensure that bottle feeding is as safe and germ free as breastfeeding. The Maids Cleveland know how much work new babies can be, and are ready to help with household chores whenever you may need them.

Here are some tips to help you organize your fridge.

1. Follow manufacturer’s guidelines
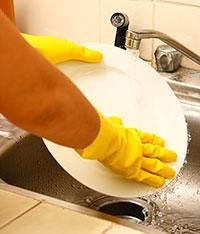
Almost every person is troubled by some tough stains on their clothes. These stains can be quite difficult to remove, and often ruin clothing. Common Stain and Their Solutions Just because there are stains on your clothes doesn’t mean you have to throw them away. There are some simple things you can do to remove stains: Grass Stains For grass stains you should use vinegar and water. Pigment in grass can adhere to the fabric, but vinegar can easily remove it. You should mix vinegar and water, and apply it to the stain, then scrub and rinse. Blood Stains These can be the most stubborn stains. Always rinse in cold water first, and then let the garment soak. Adding salt and hydrogen peroxide will remove the remaining part of the stain. Vinegar and club soda can also work well. Grease Stains These can be the most difficult to remove. You should first use basic dishwashing detergent to treat the stain. In most cases, it will be sufficient to get rid of the stain. These tips can definitely help you save your clothes from having to be discarded. It may take about one or two cycles before you are able to get rid of the stain. If you’re unsuccessful, you should call a professional cleaning service. The Maids would be happy to assist you with your stubborn stains as well as all your cleaning needs.
If You Want Cleaning Done Right - The Maids Are Here To Help
Give us a call so that we can tailor a cleaning plan that meets your needs.